In this post I perform basic CRUD operations using NodeExpress and MongoDB with Enide Studio. There is not a whole lot of information in the Web on using Node Express with Enide Studio so the task was kind of difficult. Anyway I managed to get basic CRUD operations to work. The complete code can be cloned from nodeexpress-mongo.
Here it is.
1) To get started create a new Node Express project with Enide Studio File->New->NodeExpress Project.
2) This should create the necessary files, routes and views.
3) Start the MongoDB as follows
mongod –dbpath <folder of project>
4) Start the mongo console. To get started I created 3 records as follows
mongo>

db.phonebook.insert({ "FirstName" : "Tinniam", "LastName" : "Ganesh","Mobile": "916732177728" })

db.phonebook.insert({ "FirstName" : "Darth", "Lastname" : "Vader","Mobile": "6666699999" })

db.phonebook.insert({ "FirstName" : "Bill", "Lastname" : "Shakespeare","Mobile": "8342189991" })
5) You can display the added records with
> db.phonebook.find().pretty()

{

"_id" : ObjectId("53de3f8e0e7f8abf82c0c850"),

"FirstName" : "Tinniam",

"LastName" : "Ganesh",

"Mobile" : "916732177728"

}

{

"_id" : ObjectId("53de3fed0e7f8abf82c0c851"),

"FirstName" : "Darth",

"Lastname" : "Vader",

"Mobile" : "6666699999"

}

{

"_id" : ObjectId("53de40200e7f8abf82c0c852"),

"FirstName" : "Bill",

"Lastname" : "Shakespeare",

"Mobile" : "8342189991"
6) For each of the CRUD operations there are 4 components
– Set the route
– Invoke app.get/app.post as approriate
– Call the necessary route Javascript file
– Use the appropriate Jade constructs for rendering the output
7) Here are the changes for the Display of the users
A) Displaying the User
a) app.js
..

userlist = require('./routes/userlist')

..

app.get('/userlist', userlist.list);

..
var mongodb = require(‘mongodb’);
b) userlist.js
/* GET Phone users page. */
exports.list =  function(req, res) {

// var db = req.db;

var MongoClient = mongodb.MongoClient;

var db= MongoClient.connect("mongodb://localhost:27017/test", function(err, db) {

if(err) {
- log(“Failed to connect to the database”);
} else {
- log(“Connected to database”);
}
var collection = db.collection(‘phonebook’);
- find().toArray(function(err, items) {
- log(items);
- render(‘userlist’, {
“userlist” : items
});
});
});
};
c) userlist.jade
extends layout

block content

h1= "Display the list of Users"

p

strong Firstname Lastname   Mobile

table

each user, i in userlist

tr

td #{user.FirstName}

td #{user.LastName}

td #{user.Mobile}

p

p

a(href='http://localhost:3000') Home
This is shown below
B) Adding a User
There are 2 parts to this
a) Invoking the /newuser route to display the input form
b) Invoking the /adduser route to insert the values entered in the form. The changes are shown below
a) app.js
..

newuser = require('./routes/newuser')

adduser = require('./routes/adduser')

..

app.get('/newuser', newuser.list);

app.post('/adduser',adduser.list);
These require the following
b) newuser.js
exports.list = function(req, res){
- render(‘newuser’, { title: ‘Add User’});
};
The newuser jade displays the input form
c) newuser.jade
block content

h1= "Add a User"

form#formAddUser(name="adduser",method="post",action="/adduser")

input#inputUserFirstName(type="text", placeholder="firstname", name="firstname")

input#inputUserLastName(type="text", placeholder="lastname", name="lastname")

input#inputUserLastName(type="text", placeholder="mobile", name="mobile")

button#btnSubmit(type="submit") submit

p

p

a(href='http://localhost:3000') Home
The /adduser route inserts the record into the phonebook collection as shown
d) adduser.js
var FirstName = req.body.firstname;

var LastName = req.body.lastname;

var Mobile = req.body.mobile;

// Set our collection

var collection = db.collection('phonebook');

// Insert the record into the DB
- insert({
“FirstName” : FirstName,
“LastName” : LastName,
“Mobile” : Mobile
}, function (err, doc) {
if (err) {
// If it failed, return error
- send(“There was a problem adding the information to the database.”);
}
else {
// If it worked, redirect to userlist – Display users
- location(“userlist”);
// And forward to success page
- redirect(“userlist”);
}
});
This takes us back to Display users if it successfully added the user
C) Updating a User and Deleting a User are similar to Adding a User
D) Index page
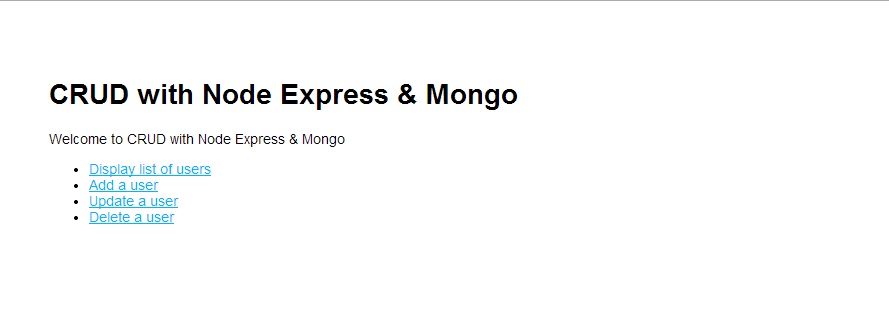
All the actions are included in the index.jade as shown below with hyperlinks
p Welcome to #{title}
ul

li

a(href='http://localhost:3000/userlist') Display list of users

li

a(href='http://localhost:3000/newuser') Add a user

li

a(href='http://localhost:3000/changeuser') Update a user

li

a(href='http://localhost:3000/remuser') Delete a user
Important tip:
Here is an important note. I found that getting the jade template right extremely frustrating. It is really unforgiving and is very picky up indents, outdents(whatever that is!), tabs and spaces. A quick way to check whether your jade template is fine or not is to install jade in your project directory.
npm install jade –global
You can debug your jade with
If there an error you will get
c:> jade userlist.jade

throw e

^

TypeError: userlist.jade:6

4|   h1= title

5|   ul

> 6|      each user, i in userlist

7|         li

8|           #{user.FirstName}

Cannot read property 'length' of undefined

at eval (eval at <anonymous>
If there are no errors you should see that the html is rendered as below
C: >jade index.jade

rendered index.html
You can clone the complete code from GitHub at nodeexpress-mongo
Take a look at
1. Brewing a potion with Bluemix, PostgreSQL & Node.js in the cloud
2. A Bluemix recipe with MongoDB and Node.js
3. Spicing up IBM Bluemix with MongoDB and NodeExpress
4. A Cloud Medley with IBM’s Bluemix, Cloudant and Node.js
5. Rock N’ Roll with Bluemix, Cloudant & NodeExpress
Find me on Google+


2 thoughts on “Elements of CRUD with NodeExpress and MongoDB using Enide Studio”